마우스 이벤트
document나 객체 위에서 마우스를 클릭, 이동하면 이벤트가 발생한다.
document.onmousedown - 마우스 클릭
document.onmousemove - 마우스 이동
onmousedown이벤트에선 마우스의 어느버튼을 눌렀는지 event.button으로 알 수 있다.
왼쪽 마우스: 0
우클릭: 2
횔클릭: 1
onmousedown - 마우스 좌클릭 이벤트
마우스의 위치를 알고싶다면 event.clientX와 event.clientY를 통해 알 수 있다.
이벤트의 정보를 토대로 마우스 클릭 시 해당 위치에 사진을 출력할 수 있다.
좌 클릭시 해당 위치에 img가 출력되도록 JavaScript 함수를 만들어 보자.
문서 자체에 클릭하는 것이기에 document객체에 이벤트 처리용 함수를 등록한다. document.onmousedown = function () {..}
document.onmousedown = function () {
  if (event.button == 0) {
    document.title = event.clientX + ", " + event.clientY
    var img = document.createElement("img");
    img.src = "C:/Class/WebClass/WebPro/WebContent/javascript/image/item01.gif"; //DOM 객체 속성

    img.onload = function (event) {
      img.style.left = img.offsetLeft - img.width / 2 + "px";
      img.style.top = img.offsetTop - img.height / 2 + "px";
    }

    img.style.left = event.clientX + "px";
    img.style.top = event.clientY + "px";
		img.style.position = "absolute"

    document.body.appendChild(img);
  }
  if (event.button == 1) {
				var imgs = document.getElementsByTagName("img");
				while (document.images.length >= 0) {
					document.images[0].remove();
				}
			}
};
이미지가 left top 위치에서 출력되기 때문에 클릭한 위치 clientX, clientY위치에서
img.width/2, img.height/2만큼 왼쪽 위로 이동.
주의할점은 사진이 로딩되는데 img.src = ... 2ms정도의 시간이 걸린다. 페이지를 막 켰거나 사진 크기에따라 로딩시간은 길어질 수 있다.
사진이 로딩되지 않은상태에서 img.width와 img.height를 출력하면 0이 출력된다.
사진이 다 로딩되면 발생하는 onload이벤트를 통해 위치를 조정해주도록 설정하였다.
event.button값이 1인 상황은 휠을 클릭했을 때 발생한다.
휠을 클릭하면 모든 이미지를 remove()메서드로 삭제, DOM객체로 받은 HTMLCollection 배열은 [0] index를 지우면 뒤에 있는 요소들이 땡겨와진다.
oncontextmenu - 마우스 우클릭시 발생하는 contextmenu 이벤트
마우스 우클릭시 브라우저 뿐 아니라 다른 여러 프로그램에서도 context menu가 출력된다.
oncontextmenu는 우클릭을 통해 context menu가 출력될때 발생하는 이벤트이다.
보통 우클릭 방지 작업을 해당 이벤트를 return false함으로 방지한다.
(onmousedown에서 event.button값을 통해 감지할 수 도 있음)
onmousedown은 우클릭이던 좌클릭이던 모두 발생하는 이벤트이지만
oncontextmenu이벤트는 우클릭시에만 발생하는 이벤트이기 때문에 의미가 크다(간단한 우클릭 처리용도 함수를 만들 수 있음)
onmousedown으로 추가된 이미지를 우클릭해서 oncontextmenu 이벤트가 발생하면 삭제하도록 해보자.
document.onmousedown = function () {
    ...
    ...
    document.body.appendChild(img);

    img.oncontextmenu = function () {
					console.log("이미지 삭제");
					var result = confirm("정말 삭제할까요?");
					if (result)
						event.srcElement.parentNode.removeChild(event.srcElement);
				}
  }
};
만약
context menu도 띄우고 우클릭 이벤트를 감지하고 싶다면onmousedown이벤트에서event.button을 조건식으로 주자….
onmousemove - 마우스 이동시 발생하는 이벤트
https://jqueryui.com/draggable/
jquery로 간단하게 구현할 수 있지만 JavaScript를 사용해 구현해보자.
onmousemove, onmousedown, onmouseup 이벤트처리가 필요하다.
.myDiv {
  background-color: #f1f1f1;
  text-align: center;
  border: solid 1px #d3d3d3;
  position: absolute;
  z-index: 9;
}

.myDivHeader {
  padding: 10px;
  cursor: move;
  z-index: 10;
  background-color: #2396f3;
  color: #fff;
}
<div id="myDiv1" class="myDiv">
  <div id="myDivHeader">Click Here</div>
  <p>DrapDrop</p>
  <p>DragOver</p>
  <p>Div</p>
</div>
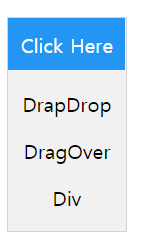
위와같은 div 태그를 생성후 myDivHeader를 클릭후 드래그하면 그대로 이동시키는 함수를 만들자.
function draggable(elem)함수를 만들고 매개변수로 객체를 넘기면
draggable(document.getElementById("myDiv1"));
해당 객체는 드래그 가능하도록 설정.
document.getElementById("myDivHeader").onmousedown = dragMouseDown;
function draggable(elem) {
  var pos1 = 0;
  var pos2 = 0; //(이동거리)
  var pos3 = 0;
  var pos4 = 0; //x, y 좌표 (기존)

  //클로저함수 3개 정의
  function dragMouseDown() {
    pos3 = event.clientX;
    pos4 = event.clientY;

    document.onmousemove = elementDrag;
    document.onmouseup = closeDragElement;
  }
  function elementDrag() {
    pos1 = pos3 - event.clientX;
    pos2 = pos4 - event.clientY;

    elem.style.left = (elem.offsetLeft - pos1) + "px";
    elem.style.top = (elem.offsetTop - pos2) + "px";

    pos3 = event.clientX;
    pos4 = event.clientY;
  }
  function closeDragElement() {
    document.onmousemove = null;
    document.onmouseup = null;
  }
  document.getElementById("myDivHeader").onmousedown = dragMouseDown;
}
먼저 dragMouseDown, elementDrag, closeDragElement 클로저 함수 3개를 만든다, pos1, pos4 변수가 각 객체별로 유지된다.
dragMouseDown메서드는 마우스 클릭시 이벤트 처리하는 함수로 pos3, pos4에 현재 클릭한 좌표값을 집어넣고 onmousemove, onmouseup이벤트 처리함수를 등록한다.
마우스를 때는 순간 onmouseup 이벤트가 호출되고 closeDragElement함수를 호출하는데 기존에 이벤트 처리용으로 등록했던 함수를 지운다.(드래그 하거나 버튼에서 손을 때도 아무일도 일어나지 않음)
elementDrag 메서드가 실질적으로 객체를 움직이는 메서드이다.
객체가 움직일때마다 기존 위치좌표에서 이동후 위치좌표를 뺀다.(이동거리)
pos1과 pos2에 저장하는데 마우스를 빨리 드래그할수록 큰 범위의 값이 저장된다.
이동된 거리만큼 left와 top에 적용하면 된다.
elem.style.left = (elem.offsetLeft - pos1) + "px";
elem.style.top = (elem.offsetTop - pos2) + "px";
마지막으로 기존 위치 좌표를 최신화 해주면 끝!
매개변수로 받은 객체에 onmousedown이벤트가 발생하면 처리되도록 정의한 함수를 등록해준다.
위에서 사용하는 event의 경우 window.event이다, 최상위 객체인 window의 event객체를 사용하는 것인데 Firefox의 경우 window안에 event가 없다.
이벤트를 핸들러(매개변수형식)로 넘겨주기 때문에 크로스 브라우징을 위해 다음과 같이 코딩해야함.
function dragMouseDown(e) {
  pos3 = e.clientX;
  pos4 = e.clientY;
  ...
  ...
}
querySelector, querySelectorAll
DOM객체에서 제공하는 선택자를 사용해 객체를 가져오는 함수.
지금까지
document.getElementById
document.getElementsByClassName
document.getElementsByTagName
등의 함수를 사용해 DOM객체를 가져왔다.
id, class명을 사용해 가져오거나 Tag명를 통해 가져왔기 때문에 별도의 id와 class가 있지 않는 특정 태그를 선택하기가 까다로웠다.
querySelector, querySelectorAll를 사용하면 css에서 사용하던 선택자를 통해 객체를 가져올수 있다.
querySelector메서드는 객체 하나를 반환하기 때문에 여러 요소를 선택하는 선택자를 사용해도 맨 처음 선택된 객체를 반환한다.
선택자를 사용해 여러 객체를 가져오고 싶다면 querySelectorAll메서드를 사용하자.
<table>
  <thead>
    <tr>
      <th><input type="checkbox" id="chkAll">Lorem.</th>
      <th>Lorem.</th>
      <th>Lorem.</th>
    </tr>
  </thead>
  <tbody>
    <tr>
      <td><input type="checkbox" id="7369" class="subchk">Lorem.</td>
      <td>Quos?</td>
      <td>Temporibus.</td>
    </tr>
    <tr>
      <td><input type="checkbox" id="7789" class="subchk">Lorem</td>
      <td>Nemo?</td>
      <td>Vero.</td>
    </tr>
  <tfoot>
    <td colspan="3">
      <input type="button" id="empAdd" value="사원추가">
      <input type="button" id="empDelete" value="사원삭제">
      <input type="button" id="empEdit" value="사원수정">
    </td>
  </tfoot>
  </tbody>
</table>
위 테이블에서 tbody에 속하는 모든 checkbox를 가져오려면 다음과 같은 선택자를 사용한다.
var ckblist = document.querySelectorAll("tbody input[type='checkbox']");
반면 theah에 있는 선택자 하나를 가져오고 싶다면
document.querySelector("thead input[type='checkbox']")
setTimeout, clearTimeOut
setTimeout()메서드는 특정시간후에 특정함수를 호출하도록 하는 메서드이다.
반환값으로 timeoutID라는 타이머를 식별할 수 있는 0이 아닌 값을 반환한다.
예약한 setTimeout() 안의 메서드는 clearTimeout()메서드로 실행을 취소시킬 수 있다.
var i;
var demo = document.getElementById("demo");
  setTimeout(function () {
    for (i = 0; i < 10; i++) {
        console.log(i);
    }
  }, 1000);
setTimeout메서드가 호출되고 멈추는(sleep) 것이 아니라 특정 시간 이후에 실행시키도록 타이머를 설정하고 계속 진행하기 때문에 i값이 모두 10으로 출력된다.
시간 출력
<h1 id="demo"></h1>
<button onclick="timer_setTimeOut();">시작</button><br>
<button onclick="timer_clearTimeOut();">정지</button><br>
시작 버튼을 누르면 demo에 시간이 출력되도록, 또한 setTimeOut()메서드를 사용해서 1초마다 계속 출력하도록 설정해보자.
var demo = document.getElementById("demo");
var timer;
function dispTime() {
  var now = new Date();
  demo.innerHTML = now.toLocaleString();
  //한번 호출되면 1초마다 계속 호출되도록 설정
  timer = setTimeout(dispTime, 1000);
}
function timer_setTimeOut() {
  dispTime();
}
function timer_clearTimeOut() {
  clearTimeout(timer1);
}
버튼을 누르면 timer_setTimeOut()함수가 호출되고 dispTime()를 다시 호출한다.
dispTime()안에선 setTimeout()메서드를 통해 dispTime을 다시 타이머를 설정해 예약한다.
꼬리에 꼬리를 물듯이 재귀적으로 호출한다.
정지 버튼을 누르면 clearTimeout()메서드를 통해 기존 예약되었던 dispTime()실행 타이머가 사라지면서 재귀호출이 멈추게 된다.
setInterval, clearInterval
사실 그냥 특정 시간동안 반복적으로 출력할 용도라면 setInterval과 clearInterval 메서드를 사용하는게 더 효율적이다.
이 함수들은 애초에 특정시간동안 반복호출하기 위해 설계 되었기 때문에 재귀적 구성을 할 필요가 없다.
function dispTime_Interval() {
  var now = new Date();
  demo.innerHTML = now.toLocaleString();
}
var timer;
function timer_setInterval() {
  dispTime_Interval(); //지연시작 맨처음 1초를 없애기 위해 처음에 한번 출력

  timer = setInterval(dispTime_Interval, 1000);
}
function timer_clearInterval() {
  clearInterval(timer);
}
onkeydown, onkeypress, onkeyup
키보드 입력시 발생하는 이벤트 속성들이다.
키보드를 누른다던가, 마우스 클릭, 윈도우 사이즈 이동, 닫기, 최소화, 최대화 등
브라우저에서 발생할 수 있는 이벤트 처리를 위한 속성들이 JavaScript에 정의되어 있다.
onkeydown |
키를 개체 위에서 눌렀을 때 발생 |
onkeypress |
키를 개체 위에서 눌렀을 때 (영어, 숫자 등)문자가 입력되면 이벤트 발생 |
onkeyup |
키를 개체 위에서 놓았을 때 발생 |
onkeydown과 onkeypress의 발생시기는 동일하며 차이점은
onkeydown는 키보드의 모든 자판이 눌리면 감지하고 onkeypress는 키보드에서 입력가능한 자판이 눌리면 이벤트가 발생.
https://dororongju.tistory.com/91
<input type="text" id="in" autofocus="autofocus"
  onkeydown="in_keydown();">
<br />
<input type="text" id="out">
<script>
  function in_keydown() {
    var out = document.getElementById("out");
    out.value = document.getElementById("in").value;

  }
</script>
onkeydown은 실제 화면에 문자가 찍히기 전에 동작하기 때문에 한박자 느린데
이게 불편하다면 onkeyup을 사용하면 된다.
채팅 프로그램에서 상대방이 채팅중인지 아닌지 알 수 있는데 onkey...함수와 소켓을 통해 실시간으로 상태를 전송중인 javascript함수가 있는 것 이다.
event객체 - keyCode 속성
이벤트와 관련된 모든 정보, 마우스 좌우클릭, 휠, 키보드 타건 등 모든 이벤트 관리는 event내장객체에서 관리한다.
웹에서 발생 가능한 이벤트 종류는 매우 많기에 지금은 키보드 관련 이벤트에 해당하는 keyCode속성 를 알아보자.
onkeydown, onkeypress, onkeyup 이벤트에서 10진수 키값을 반환한다.
function in_keydown() {
  if (event.keyCode == 13) {
    var out = document.getElementById("out");
    out.value = document.getElementById("in").value;
  }
}
참고: onkeypress에선 백스페이스를 눌리는것은 탐지하지 않는다.
event객체 - altkey, ctrlKey, shiftKey
function in_keydown() {
  if (event.keyCode == 13 && event.altKey || event.keyCode == 8) {
    console.log(document.getElementById("in").value);
    var out = document.getElementById("out");
    out.value = document.getElementById("in").value;
  }
}
alt, ctrl, shift 등과 같은 키는 다른키와 조합하여 같이 사용하는 경우가 많아 event객체에서 해당 키가 눌려있는지 아닌지 체크하는 속성이 있다.
getModifierState()
getModifierState()메서드는 CapsLock이나 NumLock이 눌려져 있는지 체크해준다.
다음과 같이 이벤트가 발생할 때 마다 CapsLock버튼이 눌려있는지 아닌지 체크할 수 있다.
if (event.getModifierState("CapsLock"))
  document.getElementId("demo").style.display = "block";
else
  document.getElementId("demo").style.display = "none";
매개변수로는 아래 문자열이 들어갈 수 있다.
"Alt"
"AltGraph"
"CapsLock"
"Control"
"Meta"
"NumLocK"
"ScrollLock"
"Shift"