Flutter cookbook - Animate a page route transition
https://flutter.dev/docs/cookbook
flutter 홈페이지의 cookbook을 따라서 코딩할 계획
모르는 문법(물론 처음 하다 보니 다 모르지만 정말 이해안되는)을 찾아 설명
모든 코드는 cookbook에서 사용하였습니다.
import 'package:flutter/material.dart';

main() {
  runApp(MaterialApp(
    home: Page1(),
  ));
}
class Page1 extends StatelessWidget {
  @override
  Widget build(BuildContext context) {
    return Scaffold(
      appBar: AppBar(),
      body: Center(
        child: RaisedButton(
          child: Text('Go!'),
          onPressed: () {
            Navigator.of(context).push(_createRoute());
          },
        ),
      ),
    );
  }
}

class Page2 extends StatelessWidget {
  @override
  Widget build(BuildContext context) {
    return Scaffold(
      appBar: AppBar(),
      body: Center(
        child: Text('Page 2'),
      ),
    );
  }
}

Route _createRoute() {
  return PageRouteBuilder(
    pageBuilder: (context, animation, secondaryAnimation) => Page2(),
    transitionsBuilder: (context, animation, secondaryAnimation, child) {
      return child;
    },
  );
}
https://flutter.dev/docs/cookbook/animation/page-route-animation
main 함수에는 MaterialApp 을 생성하고 home으로 Page1 을 전달한다.
Page1, Page2 모두 StatelessWidget 이라는 객체를 상속하며 build를 통해 Scaffold 객체를 반환합니다.
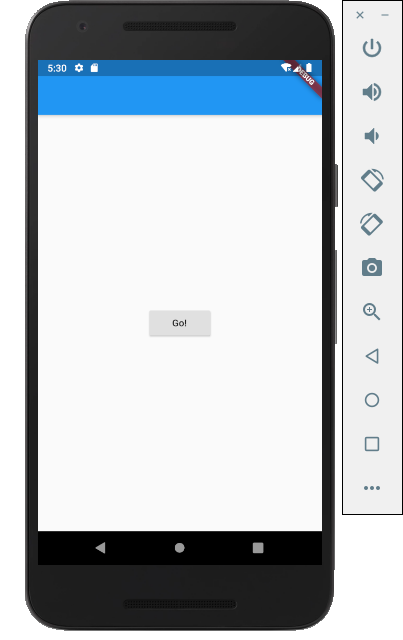
Page1의 Scaffold 는 자식으로 go 라는 문자열이 저장된 버튼이 있으며 onPressed (누름)이벤트로 Navigator를 통해 _createRoute 메서드를 호출하고
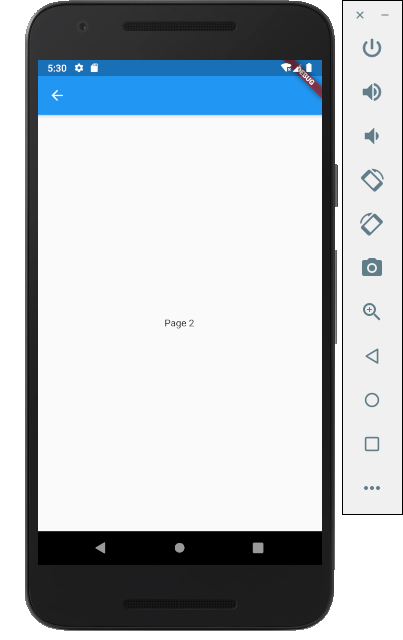
_createRoute 는 Page2 페이지를 만들어 애니메이션 효과와 함께 반환한다.
go 버튼을 클릭하면 아래 사진으로 이동
Widget
https://flutter.dev/docs/development/ui/widgets-intro
Flutter 는 React 에서 영감을 받았다고 하며 모든것이 위젯으로 이루어져 있고 위젯 상태가 변경되면 rebuild하여 변경작업이 이루어진다.
텍스트 하나까지 위젯으로 이루어져 있기 때문에 렌더링 트리에서 최소한의 변경으로 상태를 변경할 수 있다(성능UP).
import 'package:flutter/material.dart';

void main() {
  runApp(
    Center(
      child: Text(
        'Hello, world!',
        textDirection: TextDirection.ltr,
      ),
    ),
  );
}
아주 간단한 app
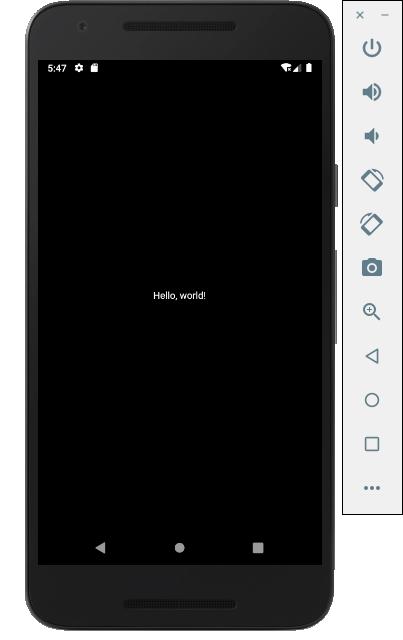
시꺼먼 화면에 hello world만 출력된다.
여기서 사용된 객체, Center, Text 모두 위젯이다.
child,textDirection는 속성
Text의 상속관계는 다음과 같다.
Object > Diagnosticable > DiagnosticableTree > Widget > StatelessWidget > Text
Center역시 마찬가지
Object > Diagnosticable > DiagnosticableTree > Widget > RenderObjectWidget > SingleChildRenderObjectWidget > Align > Center
Diagnosticable: 진단가능한, 테스트 가능한
모두 Widget클래스를 상속받는다.
위젯에 대한 설명은 아래 사이트 참고
https://flutter.dev/docs/development/ui/widgets-intro
StatelessWidget
https://api.flutter.dev/flutter/widgets/StatelessWidget-class.html
A widget that does not require mutable state. 변경 기능이 없는 위젯
어디에도 의존관계가 없고 단순 정보 출력을 위해 사용되는 고정된 위젯이다.
import 'package:flutter/material.dart';

main() {
  runApp(MaterialApp(
    home: GreenFrog(),
  ));
}
class GreenFrog extends StatelessWidget {
  const GreenFrog({ Key key }) : super(key: key);

  @override
  Widget build(BuildContext context) {
    return Container(color: const Color(0xFF2DBD3A)); //2dbd3a: 초록색
  }
}
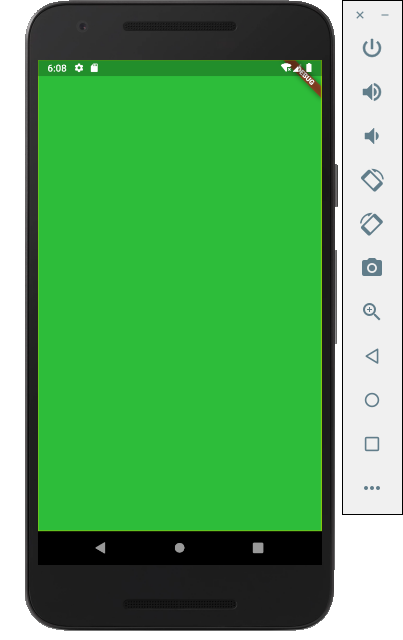
그냥 초록색 창을 출력한다.
플루터의 생성자는 c++의 이니셜라이저를 사용한 생성자와 비슷하다.
const GreenFrog({ Key key }) : super(key: key);
생성자에서 받은 key 파라미터를 상위클래스로 넘긴다.
A Key is an identifier for Widgets, Elements and SemanticsNodes.
위젯의 식별자, 위젯의 상태를 나타낸다.
Elements,SemanticsNodes는 대충 엄청 상위의 클래스라 생각하고 넘어가자.
https://stackoverflow.com/questions/22324934/what-do-curly-braces-wrapping-constructor-arguments-represent
중괄호는 생성자 매개변수 값을 선택적으로 넣을 수 있도록 설정한다.
const 생성자는 body를 가질 수 없다.
import 'package:flutter/material.dart';

main() {
  runApp(MaterialApp(
    home: Frog(),
  ));
}
class Frog extends StatelessWidget {
  final Color color;
  final Widget child;

  const Frog({
    Key key,
    this.color = const Color(0xFF2DBD3A),
    this.child,
  }) : super(key: key);

  @override
  Widget build(BuildContext context) {
    return Container(color: Color(0xFFEE82EE), child: child);
  }
}
조금더 어려운 코드를 봐보자.
맨처음 Frog 화면은 생성될때 초록색(2DBD3A)을 가지고 있지만 build(랜더링)되면서 this.color가 아닌 새로만든 분홍색(EE82EE) 으로 바뀌게 된다.
어찌됐건 StatelessWidget는 변합없는 화면 정도로 이해하면 된다.
Container
Container 상속관계
Object > Diagnosticable > DiagnosticableTree > Widget > StatelessWidget > Container
컨테이너는 이런 녀석이다.
import 'package:flutter/material.dart';

main() {
  runApp(MaterialApp(
    home: Frog(),
  ));
}
class Frog extends StatelessWidget {
  const Frog({
    Key key,
    this.color = const Color(0xFF2DBD3A),
    this.child
  }) : super(key: key);

  final Color color;
  final Widget child;

  @override
  Widget build(BuildContext context) {
    return Container(
      color: Color(0xFFEE82EE),
      child: Center(
        child: Container(
          margin: const EdgeInsets.all(10.0),
          color: Colors.amber[600],
          width: 48.0,
          height: 48.0,
        ),
      )
    );
  }
}
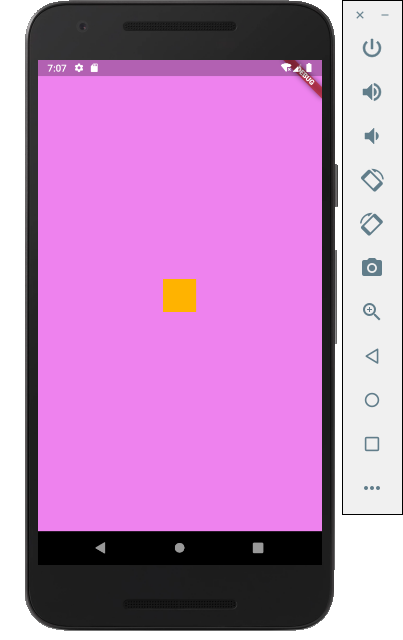
화면에 표시하고 싶은 컨테이너(Widget)을 생성,
컨테이너의 생성자는 아래처럼 생겼다.
Container({
  Key key,
  this.alignment,
  this.padding,
  Color color,
  Decoration decoration,
  this.foregroundDecoration,
  double width,
  double height,
  BoxConstraints constraints,
  this.margin,
  this.transform,
  this.child,
}) : assert(margin == null || margin.isNonNegative),
      assert(padding == null || padding.isNonNegative),
      assert(decoration == null || decoration.debugAssertIsValid()),
      assert(constraints == null || constraints.debugAssertIsValid()),
      assert(color == null || decoration == null,
        'Cannot provide both a color and a decoration\n'
        'The color argument is just a shorthand for "decoration: new BoxDecoration(color: color)".'
      ),
      decoration = decoration ?? (color != null ? BoxDecoration(color: color) : null),
      constraints =
      (width != null || height != null)
        ? constraints?.tighten(width: width, height: height)
          ?? BoxConstraints.tightFor(width: width, height: height)
        : constraints,
      super(key: key);
assert는 일종의 예외처리 함수, 괄호 값의 true가 아니라면 오류를 발생한다.
Scaffold
대부분의 앱 화면은 Container로 생성하지 않는다. Cookbook의 코드에서 Scaffold 를 사용해 전체화면을 구성하고 내부에서 Container 를 사용해 레이아웃, 디자인한다.
Scaffold 는 뼈대라는 뜻이다. 페이지에서 필요한 기본객체를 포함하고 있고 자주 사용되는 객체(플로팅 버튼 등)는 속성을 통해 추가 가능하다.
...
return Scaffold(
  appBar: AppBar(),
  body: Center(
    child: RaisedButton(
      child: Text('Go!'),
      onPressed: () {
        Navigator.of(context).push(_createRoute());
      },
    ),
  ),
);
...
Object > Diagnosticable > DiagnosticableTree > Widget > StatefulWidget > Scaffold
Container의 형제레벨쯤 되는 상속위치이다.
Implements the basic material design visual layout structure.
일반적인 material디자인 레이아웃을 갖는 위젯, 확실히 그냥 녹색 배경의 빈화면이나 노랑색 Container박스를 만드는것과 다르다.
위에 메뉴바(appBar)도 있고 이쁜 버튼도 만들 수 있다.
또한 StatefulWidget 를 상속하기 때문에 생성된 후 동적으로 변경 가능하다.
https://api.flutter.dev/flutter/material/Scaffold-class.html
이외에도 만들수 있는 여러 위젯이 있으니 확인
Navigator
이 글의 제목은 Animate a page route transition이다.
즉 화면간 이동을 설명하는 cookbook이기에 RaisedButton을 누르면 실행되는 onPressed속성에 정의된 익명 메서드가 제일 중요하다.
...
onPressed: () {
  //Navigator.of(context).push(_createRoute());
  Navigator.push(context, _createRoute());
},
...
In Flutter
these elementsare called routes and they’re managed by a Navigator widget. The navigator manages a stack of Route objects and provides methods for managing the stack, like Navigator.push and Navigator.pop.
Flutter 에서 페이지들은 Route 에 의해 생성되고 Route 는 Navigator 에게 관리된다.
Navigator는 push, pop메서드를 사용해서 Route 객체를 스택처럼 관리한다.
of(context)는 현제 페이지의context(상태)의NavigatorState를 반환
Route
Route는 Navigator에게 관리당하는 추상적 객체이다.
위의 Route객체를 반환하는 _createRoute()전역 메서드를 보자.
Route _createRoute() {
  return PageRouteBuilder(
    pageBuilder: (context, animation, secondaryAnimation) {
      return Page2();
    },
    transitionsBuilder: (context, animation, secondaryAnimation, child) {
      return child;
    },
  );
}
실제 반환하는건 PageRouteBuilder라는 클래스,
상속구조
Object > Route<T> > OverlayRoute<T> > TransitionRoute<T> > ModalRoute<T> > PageRoute<T> > PageRouteBuilder
Widget을 상속하지 않는다.
즉 페이지, 스크린과 같은 위젯을 관리하려면 이를 가리키는 Route객체가 필요하고 Navigator의 pop, push 메서드로 메모리에 올렸다 내린다.
PageRouteBuilder의 생성자로 2개의 속성을 초기화한다. 모두 메서드 정의를 가지는 속성이다.
pageBuilder, transitionsBuilder속성에 익명 메서드를 정의, pageBuilder는 만들 페이지의 객체를 반환, transitionsBuilder은 애니메이션 설정이다.
각종 애니메이션 참고: https://medium.com/flutter-community/everything-you-need-to-know-about-flutter-page-route-transition-9ef5c1b32823